Friday 19 September 2014

Adam's Input to my crafty room

We have had this mini set of drawers for a while - they were bought with a purpose to start with but have since become redundant. They look like they should be really handy though so as with most things, we didn't want to get rid of them "just in case" they might be useful in the future.

They were pretty boring and plain to start with  - just plain wood - but Adam recently had the idea that if he were to paint them up for me then they could be really jazzy and would look really good in my study/crafty room.

If he had the idea then I thought I would leave him to execute it. I would help with the fun bit of course! So we went out to choose some paints.
A nice variety of really bright colours should do the job nicely and really cheer the drawers up.

Adam started off by spray-painting the outsides of the drawers in a plain white and then set to work painting the drawers with these little tester pots of colour
They go well with our crockery really as well! You can just see one of the pots hiding away in the back of this picture.
I am really really pleased with them and they are filling up very nicely. They are incredibly useful for keeping all sorts of my new fabrics and soft crafty things.
There will definitely be more blogs coming up soon so that you can see what I have been doing with all of the things that are currently filling the drawers.

Wednesday 17 September 2014

My Sneaky Crochet Project - Discovered!

For a little while now I have been working on a little sneaky crochet project for myself.

I don't know if I ever mentioned it but almost exactly a year ago now I went on a trip with my local yarn shop (Knit Nottingham) to a new craft fair that had been arranged in Skipton. Last year was it's first show and it was so successful that it is running again this year. Unfortunately I can't make it this time around due to work commitments but it was a fantastic event.


Anyway, I got a little side-tracked there...a year ago when I went to Yarndale I bought this lovely 4-ply yarn. I found the picture!

It is hand died and was quite expensive so I know I certainly didn't want to knit socks with it (4-ply is what is used for sock knitting) but I had no ideas what to make. I have asked around a fair bit, spoken to my friends and looked on the internet for ideas but nothing really grabbed me. I even bought some dark blue 4-ply that would go with it nicely incase I found something to make with it that required a little extra than the one ball of this fancy stuff that I have.

I kept looking and looking and the only thing that anyone could really suggest was a scarf/shall type thing. I am not normally one to wear one of these triangular scarfs so I had been trying to avoid it. As most of you I'm sure have figured out by now, I really don't like all of these fancy stitches or decorative things so even if I were to give in then I certainly hadn't found a plain enough version for me to wear.
Until I found this.


I have seen pictures of these all over Facebook and other crafty sites - they seem to be all the rage at the minute. I think just about everyone who crochets must have made at least one with the amount that I have seen around and about.


Again I don't really like to go along with crowds or follow examples set by others but this did seem like the best option I had for what to do with my beautiful yarn.


I know I have a lot of projects on the go at the minute so I was slightly worried about starting another when I already have so much else on - I thought my hubby might have a little moan about me having so much stuff everywhere and that nothing was getting finished. So it has really been a secret project. I have made a conscious effort to try to only work on this at times when I am hanging around - so sat in the car waiting for him to finish work (or for me to start) - it is called a road trip scarf after all - or waiting for college to start when I am hidden away in the study at home waiting for my lectures etc. Any time really when I have a few minutes peace and quiet.


It is called the road trip scarf as it is designed to be done whilst sat in a car - I love the story behind it. Well it is slightly gruesome/sad to start with but the idea behind it is great from there. A lady was crocheting as a passenger in her car and the project she was working on required her to change yarns. As she was using her craft scissors and cutting the ball of yarn from her work there was a sudden movement with the car and she ended up cutting herself with the scissors. She therefore decided that this was far too dangerous a pass-time in the car but really didn't want to give up on this perfect crafty time. This is where the road trip scarf pattern came from. It can be made using one yarn (variegated is usually used to give a colour change without the need to cut the yarn) and is a really simple pattern so can be done relative easily once you get going, without a pattern.


I started this with my pretty yarn in the car one morning whilst waiting to start work. The first few rows are the tricky part as they are slightly fiddly with the size of the piece as it begins but after the 4th or 5th row the continuing pattern starts and all becomes clear. From here on it is plain sailing all the way and so obvious what is to be done that there is no need for a pattern. 


I do have to admit, I have been pretty good at keeping this as my little secret - it has been hidden in my handbag since I started it - but last night I left this out after I had been working on it before college and it has now been spotted by Adam. The good news is that he really likes it and wasn't at all upset that I had been working on this while I have other projects on the go.


I think I will enjoy the making of this almost more than the wearing of it once it is done but I do love the way that it is turning out and you never know, I might turn into a shawl-y sort of a person.


I have chosen to start my scarf in the pretty yarn from Yarndale but I will be including a little of the blue that I bought to go with it just to break up the colour a little bit.
It is growing fairly slowly as I have really only been working on it in these little snippets of time between other things but I love the way that it is starting to look.
I like the fact that it grows from the middle and as there is no real pattern to it, you can just keep going until you get fed up or run out of yarn. I am sure that there should be an edging on it once you have made it to the right size, but I'm sure that even this wouldn't be 100% essential. We will see how it looks when I get that far.

Tuesday 2 September 2014

Skirt

Oooh scary - my first attempt at making a garment for myself.

I was looking through my new book - The Great British Sewing Bee - at all of the patterns hoping to have a go at making something for myself. As a first attempt, again, I wanted something that wasn't too complicated or fitted in case it would need any adjustments to the pattern or anything.

So although there are a couple of things in the book that have taken my fancy, this box pleat skirt to me looked the most straight forward and was able to be made using cotton fabric. A lot of the other patterns seem to require specialised fabric depending on what they are and if nothing else, I had no idea what some of the other fabrics were let alone where to get anything else from.
I didn't have too much of a look around for fabrics although I did remember from the last time that I had visited Hobbycraft that most of their fabrics seem to be more oriented towards patch working. They are either sold in rather small pieces or are too patterned for me to be able to get away with wearing especially being that I am not really the most flowery person in the world, I don't think these elaborate patterns would suit me.

I was racking my brains and looking online but to be honest I found that almost impossible to imagine what the fabrics would look like in real life, let alone how they would feel and how the small samples shown on the websites would translate and look when they were expanded to the size of a full skirt.

So, as always, it was hubby to the rescue - he gave me the idea of looking at other things that were pre-made but using big pieces of material. We had a trip out that same day and went to Asda of all places to take a look at their home section. After looking around for a while we settled on this duvet cover - checks on one side and stripes on the other. Weirdly I think the most difficult thing about choosing from the home wear section was that all of the colours that seem to be used for home decorations are very different from the colours that are commonly found in clothing.

What I found was sort of the best of a bad bunch as the others, were either too bright or really dull brown-y colours. The other problems were that the patterns on some of the items we really large so as soon as the full item was cut down to a size that could be used the pattern would be completely lost.

There was a stripy side to the material as well as a checked side - I hadn't decided until I got home which side would be best to use. The biggest problem I found was that neither of the patterns were symmetrical. This I found the biggest challenge when it came to making my garment as one of the major criteria is really is both sides are even.

For this reason I chose the checked side as I hoped that the full-ness of the pattern in this material would mask the un-symmetrical-ness the best.

I don't have any photos of the pieces of the skirt being cut out unfortunately (sometimes this can be the most exciting part!) but there had to be some photos at crucial points.

Lining up the pleats front and back to ensure that the pattern matched - or as well as it could with the un-symmetrical pattern. This involved using the lines drawn on from the pattern and linking them together. I then pinned each one in place and as per the recommendation from the pattern, tacked these into place to be sewn into the waistband later.
Each one would need to be lined up separately and the pattern matched the best that I could. I chose the largest green line to use down the middle of both the front and back pieces of the skirt as I thought that this was the most dominant design feature and would therefore look the best at the centre of the design.
As well as lining each fold up to ensure that they met in the middle, I also did my best to ensure that the horizontal lines were are the same level and therefore carried in lines throughout the skirt.
Once everything was matched up and tacked the sewing could begin. First down the side seams of the skirt. I used my mannequin (Rosie) to test out the size and fit of the skirt once the pieces were attached and the pleats secured.
I am not sure if you have met Rosie before but she was a little treat from my husband around my Birthday time when I decided to give sewing and in particular, dressmaking a go. As with most things in my life, she definitely had to have a name so welcome to the family Rosie! I think that she is pretty accurate in size and proportions to me and has been incredibly useful. It is sooo much easier to keep dressing and undressing her throughout this process than it would have been to do the same with myself (and less spiky with the pins too!)
 Looks like this is going to be a fairly good fit I think. Now for the zip - decisions, decisions… I went with the cream one in the end as this seemed to match the best so that it was least obvious.
 I had been told how difficult the whole invisible zip thing was but I am not too sure how much I believed anyone - it is definitely more difficult than it looks! I tacked in in place first, as suggested in the pattern and I was really pleased I did as it is zoo tiny and fiddly.
 And this is the outcome. Not completely invisible - I think I needed to overlap more of my fabric over the zip on each side to get it to be completely hidden but not too bad for a first attempt I don't think.
And finally, with the waistband attached I finally plucked up the courage to try it on again and even to wear my first creation out in public today. This was my work outfit from earlier on. I know that this is by no means perfect but I really am quite proud of myself for how this came out. I have very little experience (this is only the third thing that I have ever sewn in my life) and with no real instruction other than what I have seen on TV, in the book that I bought and a little bit of internet browsing, I really am quite pleased with the way it came out.
My first garment and it is even suitable to wear in public.


Wednesday 27 August 2014

Our First Arty Farty Purchase

I've never really understood the whole art thing before. I've never really visited any art galleries or anything like that and have certainly never understood how anyone could be "moved" by art. This is all until we were away on our summer holiday to North Yorkshire in July - we went back to visit the same small place near Whitby that we have been to last year around the same time and also in the winter a few times as well.

While we were there we were recommended that there is a lovely art gallery and cafe in one of the nearby towns. As we were planning on having a walk that way anyway, to Grosmont, the idea of the lovely cakes certainly were a winner for me and my husband as well so why not go and have a look around.
It was lovely, only a tiny little gallery called The Geall Gallery. It's not one of these stuffy horrible places where everyone walks around in silence and there is no atmosphere, it is essentially a little cafe that just happens to have lovely art work on the walls. The major bonus of it (or very expensive problem really) is that all of the artwork that is up and around and about is for sale.

There are a couple of other artists that display their work there but the main one is Chris Gaell. His website is here. As we walked in we instantly fell in love with his work. Neither me nor my husband could believe how real all of the paintings looked and as they are all painted using a palette knife they are also really really tactile. They looked totally different close up to when we viewed then from further away but all of the time maintaining their amazing ability to appear completely real and almost photo-like.

They were slightly out of our price range on this visit to go for one of the large paintings that we really did love. Chris does some that are about 2m wide by 50cm tall and would look absolutely perfect above our sofa in our lovely newly decorated living room. I think that one of these might have to be a treat to ourselves at some point but will need some saving up first. Maybe this will be next years Wedding Anniversary to each other.

After looking around for a while this summer and trying to resist one of these lovely big pictures, I have to admit, we did finally give in and make a purchase.

We were looking at all of his slightly smaller pictures but couldn't quite find anything that looked right or would go in our living room (if we were buying real artwork it has to be in pride of place in our house) so we started to look at his smaller pictures. These are about 15cm x 15cm without the frames so not very big at all - they come to about 20cm x 20cm with the frames although the frames that they were all displayed in in the gallery were a really dark wood colour.

The scenes depicted in the smaller pictures ended up being our favourite scenes but we weren't really sure how just one of these pictures would look in our living room soo...

we might have ended up buying 6 of them...woops!

These were the pictures as they were displayed in the gallery - one of them hadn't even been framed yet
Chris very kindly agreed to change the frames of these as the dark wood wouldn't match anything in our house or especially the living room - he uses ash wood normally and stains this to get the dark finish but he had some untreated wood that he hadn't started to use yet for his frames. He agreed to treat this with a clear lacquer for us so that the wood maintained a more natural finish. This is the final result.
They are up in pride of place in our living room - I love to sit and look at they - they are directly opposite the sofa and in an evening our lamp even points in the right direction to light them up just perfectly. Yes ok, they were a lot of money (if you can't tell, I'm still slightly shocked by our extravagance with these) but they are one of my favourite things that I have ever purchased. I love them so much - they just make me smile every time I look at them and, I know this may sound slightly crazy but they definitely change each day. Sometimes the water in the Beck looks a lot clearer than others and the light coming through the trees in the picture in the top right definitely looks brighter some days than others. I almost feel like these are little windows to the outside where I can see what is happening in each of the places.

And that is definitely enough soppy, crazy talk for today. I'll be posting again shortly with more of my own crafty things and my recent makes.

Monday 25 August 2014

Sewing bag makes

Ok so now I have a fantastic new sewing machine (and no real clue as to how to use it!) I needed to find something to make with it.

As I said in my last post, I did order the Great British Sewing Bee book along with my machine to give me a few ideas but I think that perhaps going straight from making an apron out of a shirt - and lets face it not really changing too much of the basic shirt its-self to make this - to making something like a dress could be a bit too big of a step for me.

So again, what else to do but to hunt the internet...

...I found this amazing sewing bag pattern online and for free - please find the link to the pattern here

I decided that this didn't look too tricky for a first project and set to work using some of the fat quarters that I had received in one of the Crafty Creatives boxes that I used to receive on a monthly basis.
I chose these two and a stripy red and white as I felt that they worked the best together and I absolutely LOVE the owl-y fabric so this had to be the most visible on the outside of the bag. I chose the stripy red material for the inside as I hoped that this would be the easiest fabric to line up and make the square - I am not sure really if this did make it easier at all of just more obvious when it wasn't quite straight!

This was a lovely project to start with for the first use of my first ever (proper) sewing machine - it now means that I have somewhere to keep all of my pretty new threads, scissors etc.
I was so pleased with the final result that I showed a few people how it had turned out and my Mother-in-Law especially loved it!. I decided to make her one as well as it is a nice project to practice with. She seems really pleased with hers as well. She sent me this photo of the final product all filled up with all of her sewing bits and pieces.
The materials that we chose for her bag were again a couple of fat quarters that I had bought and the lining came from an old shirt donated by my Father-in-law. Another stripy lining so again a little bit tricky to make sure that it was lined up all correctly but I think it turned out ok in the end. The only error that I made with making this bag is that when I was cutting the fabric for the pockets around the edge of the bag I made one of the strips slightly shorter than the other. This piece of fabric must have also not been quite as wide as a normal fat quarter as I wasn't able to quite make the pockets as tall as they should have been - again one is slightly shorter than the other.

The shortened length of the pocket on one side makes a nice little pocket for scissors to be kept in or any other small/flat item.

I do like the way that both of these have turned out and really enjoyed making them. I can't believe how differently they both came out really as they were made following the same pattern (with a few of my own adaptations). These would be really great fun to keep making potentially as gifts and in different fabrics. I would like at some point also to try to enlarge the pattern and make this again. I would need a few more fat quarters and, if I wanted to main components of the bag to match then these would need to be in the same designs but I think that this would be do-able - the trickiest might be getting a piece long enough to make the pockets (as the pleated pocket did use a full length of fat quarter) or joining two along the edge.

Hmmm...I will have to think about it. It might also be nice at some point to add a fastening to the bag, some sort of cover over the open top possibly. Something to decide if I make this again.

I hope that you are all having a fabulous day - keep on crafting. See you soon for the next instalment.

Saturday 23 August 2014

Birthday

My Birthday - it was in April but hey, I'm only 4 months behind in my blogging about it.

It was a very chilled out day really - I didn't really want to do much, just enjoy having a nice peaceful day off with no work to go to and lots of time to do exactly what I wanted. We made some huge sandwiches of all of my favourite fillings and bought a few other treats and went for a walk down to the lake at our local country park.
We just sat there, minding our own business, munching on our goodies and chilling out.
When we got back me and the hubby set to work and made a cake before we had a few people around in the evening. We just made a normal sponge mix in two tins but then we were let loose with the chocolate. We melted down far more than we would ever need to cover the cakes and started decorating (I was eating the rest from a mug after it had solidified again for a few weeks after!)
 A little bit of chocolate butter icing in the middle (my favourite!) and we sandwiched them together.
It was really great fun to make and tasted delicious. I would definitely make it again (and have done since). The only problem with it is when it comes to cutting the slices and serving it. As the chocolate had set so well by this time it was pretty tricky and did make the butter icing in the middle squidge out a little bit.

When it comes to presents I generally have no ideas what to ask for for these kinds of events, although I love them every year and who doesn't love to be spoilt, this year I have to admit that I found it quite tricky to choose something that I would like.

The best suggestion that I could come up with for this was a Kindle - I don't read massive amounts of books every year or anything - nothing compared to what other people with these kind of devices seem to anyway so I really wasn't sure about asking for one at all - I wasn't sure if I would read it at all - it could end up just being one extremely expensive book. As it turns out I have used it a LOT! I love it and sit and read nearly everyday - it is a great way to spend my lunch times at work if I am not able to crochet or knit (it depends who's around as lots of people would look at me really weirdly if I got out my stuff and suddenly started to crochet in our canteen at work.)

So along with this, as I knew I was going to be getting a Kindle for my birthday as this was from Adam - I decided that a sensible thing to also ask for was Amazon vouchers. I thought I would only get a little bit - enough to get a couple of books for my Kindle but quite a few people seemed to cotton onto this idea and I ended up with a substantial amount. I am very lucky.
Having had my tiny little go at sewing with a machine and making my apron I really enjoyed it and thought that this would be something that I could really enjoy doing - especially if I had a machine that was substantially bigger and didn't keep eating my material all of the time!

I had no ideas what sort of machine would be best or what I would get on with the most so - after reading what felt like hundreds of reviews and trying to decide what functions I might actually use on a full-sized machine (I had no idea what I would need really!) I decided to go with this:
It's theJanome 525S and the machine that was used a lot on the Great British Sewing Bee. It seemed to have a lot of good reviews and obviously was chosen to be used on the show so I decided to go for this with my fingers crossed it would be good.

With it I also purchased this Great British Sewing Bee book to give me a few ideas of what I might be able to make and some really basic pointers for how to go about it.
As it turns out, I absolutely love it and have used it loads - almost more than I thought I would. Like I have said - this sewing thing could really get addictive!

Thursday 21 August 2014

Apron

I was very inspired by watching the Great British Sewing Bee over the winter and I think that the idea of re-using things and up-cycling is terrific. I know that this is huge fashion thing at the minute as well - which really isn't the reason why I like it.

I have always hated the idea of waste - I like to re-use as much as I can - I hate throwing anything away: food, clothes etc I really cannot stand being put to waste. This is probably why I have had and worn most of my wardrobe for at least 5 years and am only ever really persuaded to buy new clothes when my Mum takes me shopping! I am still then really awful at throwing these things away even when I then have new clothes. The old stuff is always just the comfiest and most enjoyable to wear!! Oh well - you know me, if I could then I would happily walk around in my PJs all day, every day.

So, with that in mind, as my first project, I didn't end up recycling any of my clothes at all! I decided to cut up and adapt one (or two) of my husbands shirts (old one's I might add - that he really shouldn't have been wearing any more!)

I only had this tiny little sewing machine to use as this was the cheapest little machine that I could find. I had no idea how I would get on with machine sewing, having never really used a sewing machine before in my life.
As my first project and an experiment to see if I was able to use a sewing machine, I decided to convert this old shirt into an apron. Not too much of a dramatic change but my favourite part of the show for The Great British Sewing Bee was always the converting of a garment into something totally different. I also didn't want to waste any good material that could have been used for something better if I wasn't able to create anything at all from it.

Here is the end result:
It's by no means perfect but I didn't think that this was too bad for a first attempt ever of sewing at all with a machine. The thing that I found most annoying was that due to the basic-ness of the little machine there wasn't an automatic tension on it and therefore if I forgot to loop it through the correct bit, or looped it through wrong, I did have a few disasters where the machine ate my material and a load of thread or it would just not sew and would snap the thread all together.

And here begins my new hobby - sewing!

Tuesday 19 August 2014

A little bit more of my blanket...

Wow. So it really has been a long time since I last posted and sooo much has happened in my little crafty world since February. I have decided that I need to catch up with everything on here and hopefully the best way will be to post quite a few different blogs over the next few weeks - giving you a couple of days between each to digest and read them.

I guess the first thing that I should give you a little catch up on is my crochet mood blanket - as that was my last blog back in February. I was going through a little bit of a rough time at that point and I think the last meaningful square that I had was the one I made for the day of my Gran's funeral. After a couple of rough months at the beginning of the year and attending two family funerals in the first two months, I am happy to say that the rest of the year has picked up quite considerably.

I have added quite a few more meaningful squares to my blanket.

There's one for February 14th - moving day! The day that we got the keys to our house, a full 2 years ago now!
And I also added quite a few for the Winter Olympics. The Olympics are by far my favourite sporting event ever shown on TV and especially the winter ones definitely have a place very close to my heart. I was never quite crazy enough on skis - either with the idea of flipping myself through the air (I don't like to have my feet leave the floor really if I can help it) or with throwing myself down a mountain at breakneck speed. I will definitely stick to my instructing and concentrate my energies on teaching the sport rather than doing these crazy things myself. Maybe one day I will see one of my students skiing for the British team and get my tiny claim to fame that way!

So these squares are what I added - one for the opening ceremony - I still need to attach the rings to this one but I tried to crochet the square to make the effect of the snow and it's texture.
 I tried this out as an idea for the days when my favourite skier raced. I had the amazing privilege of being able to meet the amazing Chemmy Alcott a few years ago when I was out in Canada working on a world cup race - I volunteered to help with the event before the season really began and I started to teach.
The square its-self I wasn't too happy with as it didn't quite come out the right shape to fit in the blanket but I still like the idea and kind of wished that it had - I have thought about turning it into part of a cushion cover at some point but as of yet this has been added to the list of ideas that I have floating around in my head and not actually materialised.

This is what I ended up with - Chemmy always wears a pink helmet even with her GB kit hence the colour scheme.
There were a few more very good days throughout the Olympics where GB won medals - each day I made this kind of square and then added the colour of the medal around the edge:
I also made another "snowy" square for the day of the opening ceremony of the Paralympics (the same as the Olymics opening ceremony day) - I still need to make the coloured tick-type shapes to add as the logo for the Paralympics

Only a few more special days - Henlow's birthday - 3rd March - this is the day that we got him last year
My Birthday - 9th April - I wanted a very chilled out birthday this year. I received a Kindle for my Birthday from my husband (with a purple cover - hence the purple edging) and we went for a walk with a picnic to the little lake near our house so this patchwork was to represent the blanket that we took with us and sat to chill out on by the lake
And the following day we went to The Deep in Hull for a day out:
This is about as far as I have got at the minute - I am up to 16 May - quite a bit of catching up to do and I have some special squares still to add - mostly around July as this was when we went on our holiday and also when our wedding anniversary is.
It has been far too hot over the summer, especially as the blanket is starting to get quite big and heavy to carry on with the squares but as it is now starting to cool down a fair bit then I should be able to start catching up fairly soon. I have also had a few other exciting projects and new hobbies to start to get into recently so I have been quite busy with these things.

As promised at the beginning of this post, there will definitely be more updates with some of these other things very shortly

Tuesday 4 February 2014

Yesterday's square of my crochet blanket

Ok so, I know I said that the squares of my "mood" blanket were to be random - this is mostly the case but occasionally I do feel that some things should be added that mean something.

Yesterday was my Gran's funeral.

So in her memory I added a special square to my blanket.

This one is knitted again as the one a few weeks ago was and again in white for the same reason, however yesterday was a time to remember all of the happy times that everyone had spent with Gran. One of my biggest memories of her from when I was a small child was her baking. As well as knitting, she was a fabulous traditional cook and her cakes were some of the best that I have ever tasted. My favourite's were always her butterfly cakes.

If you're not too sure and my wonderful knitted attempt to replicate it isn't self explanatory enough then these are cup cakes where after they are cooked, the top is cut from the top of the cake. This little bit that is removed is then cut in half, whipped cream and jam added to the top of the cake and the two little pieces of sponge stuck back in to form wings on the top of the cake.

I started off knitting my cake with a pattern that I found on Ravelry. This worked for the cupcake case and the start of the sponge but then unfortunately I was on my own for the rest of the pattern. I wasn't too sure where to go from there so I just sort of made it up as I went along - I tried to keep the cake part the right shape and then added a blob of cream and finally a blob of jam to the top. I knitted up a couple of "wings" separately and then sewed these to the back as if they had been squidged into the cream.
It's perhaps not the most perfect little cake in the world - the real thing made by my gran would have tasted much nicer! - but as this is the first time I have ever tried to make up my own knitting pattern then I am quite proud of this one.

Here's another update of how my blanket is looking at the minute
It's starting to look ever so slightly more like a blanket and less like a scarf than it was doing.

My Mum brought this over for me a few days ago - it was one of the few remaining possessions that my Gran had in her nursing home room at the end. Her knitting bag. It's nice to see that my Gran's love of knitting never really ended even when she wasn't capable of picking up her needles. A lovely bag, with her knitting pattern file and a folder full of needles in there too.
 Some of the patterns are really old fashioned and I don't really remember anyone wearing these. My Mum said that she can remember some of them though.
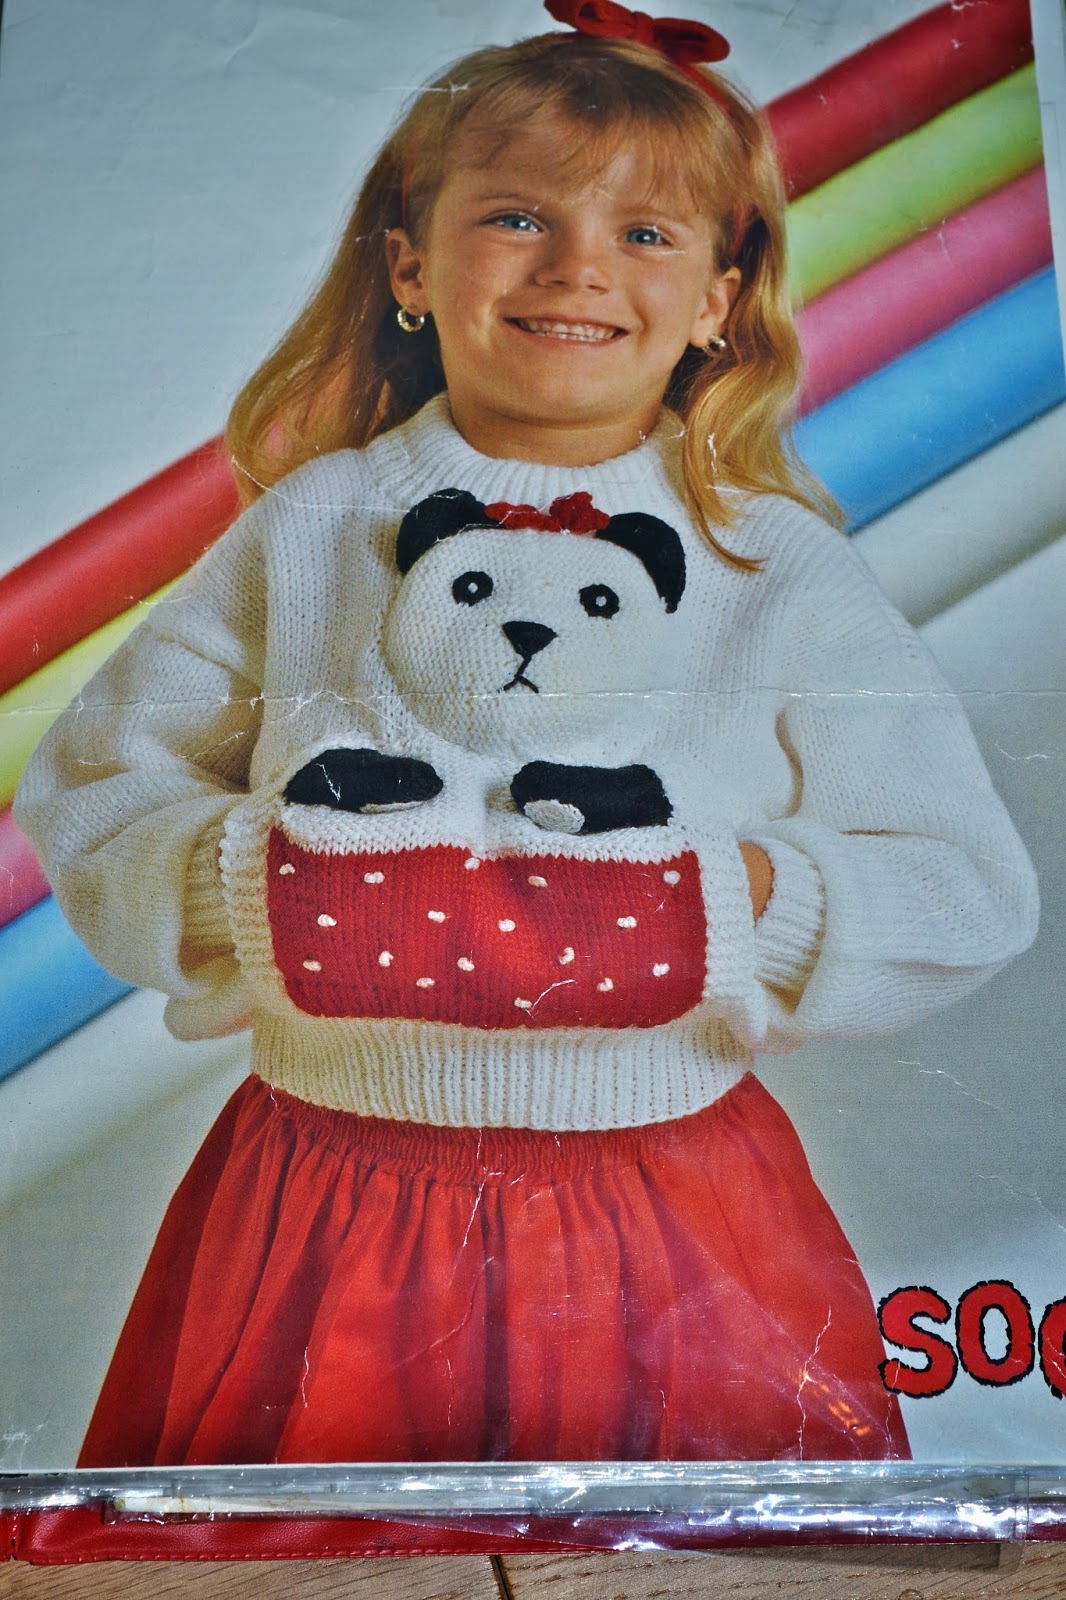
 There are also a few in here that I know I was made as a child. I definitely remember this one and there being a picture of little me on Gran's wall for years of me wearing it.
 And this is the pattern for the ballet cardigan that I had as well. I don't think that this one will ever go out of date!
I love looking through all of these kinds of things. It's amazing what memories can be gained from a folder of old knitting patterns!

I really love this and feel truly privileged to have been given this to look after. It's something that I think I will always keep and will be treasured in my craft room forever.