Tuesday, 23 August 2016

Bullet Journal

I have recently seen the idea on Pinterest and other social media for creating what's called a bullet journal. I have always loved all kinds of stationary and notebooks etc. (sad I know!) but this has given me a great idea and purpose for one of the many books I have. It's also going to be a fantastic excuse to use colouring crayons, coloured pens, stickers and all sorts.

I have seen that lots of people create all kinds of colourful and elaborate pages in theirs and I know that mine probably won't be as pretty but I have decided to start out with the basic principle to begin with.

I tried out the idea of a year planner as one of the first pages as this is what I've seen in lots of people's journals. As you can see I got as far as updating this for July. I did this when I first started the journal but haven't got any further than this. I don't think a full year planner will be something that I will bother with really going forward. The whole point of the bullet journal and using a notebook to record your ideas and plans instead of a regular diary is that it's completely adaptable to what you want to make it.
I have started off using this notebook for now to see what works for me and what I will and won't use. I have already decided that this is probably one of the things that will go out of the window when I transfer to my shiny new notebook. That's the joys of the whole concept.

From the start of my notebook I have also added a number of other pages. the next is this:
A goals page for the year. I do like the idea of creating this kind of thing at the beginning of a year so that I can track my progress throughout the year and see how I am getting on. I did cheat a little by starting this half way through the year but all of this is still to be achieved.

I wasn't sure how I was going to plan out my notebook to start with and spent a couple of weeks researching ideas for pages that could be added. There were a lot of really good ones that I would like to try or have tried within my notebook but one of the things that I found hardest to work out was the order that everything should be added. I couldn't find too many tips on this kind of thing online which I was really confused by as lots of other people seem to used notebooks that have fixed pages and not rings.

I have tried to start with to go with the yearly stuff at the beginning - so the couple of pages that you have already seen - then monthly things, weekly things and collections towards the back. I had to add extra tabs already to my notebook to work this out and found it very difficult to try to calculate how many pages I might need for each thing.

I have worked out I think that people probably must split their notes into two really. All of the time related stuff at the beginning of their notebooks and the collections and unlimited time stuff towards the back. This is what I am going to go with in my new notebook I think. I did re-arrange my pages a little from the first couple of weeks that I started and brought forward some of the weekly pages.

The next page that I have added to my notebook is a revision plan. I have another exam to sit in September and as this covers a couple of month, I could justify this as being the next page.
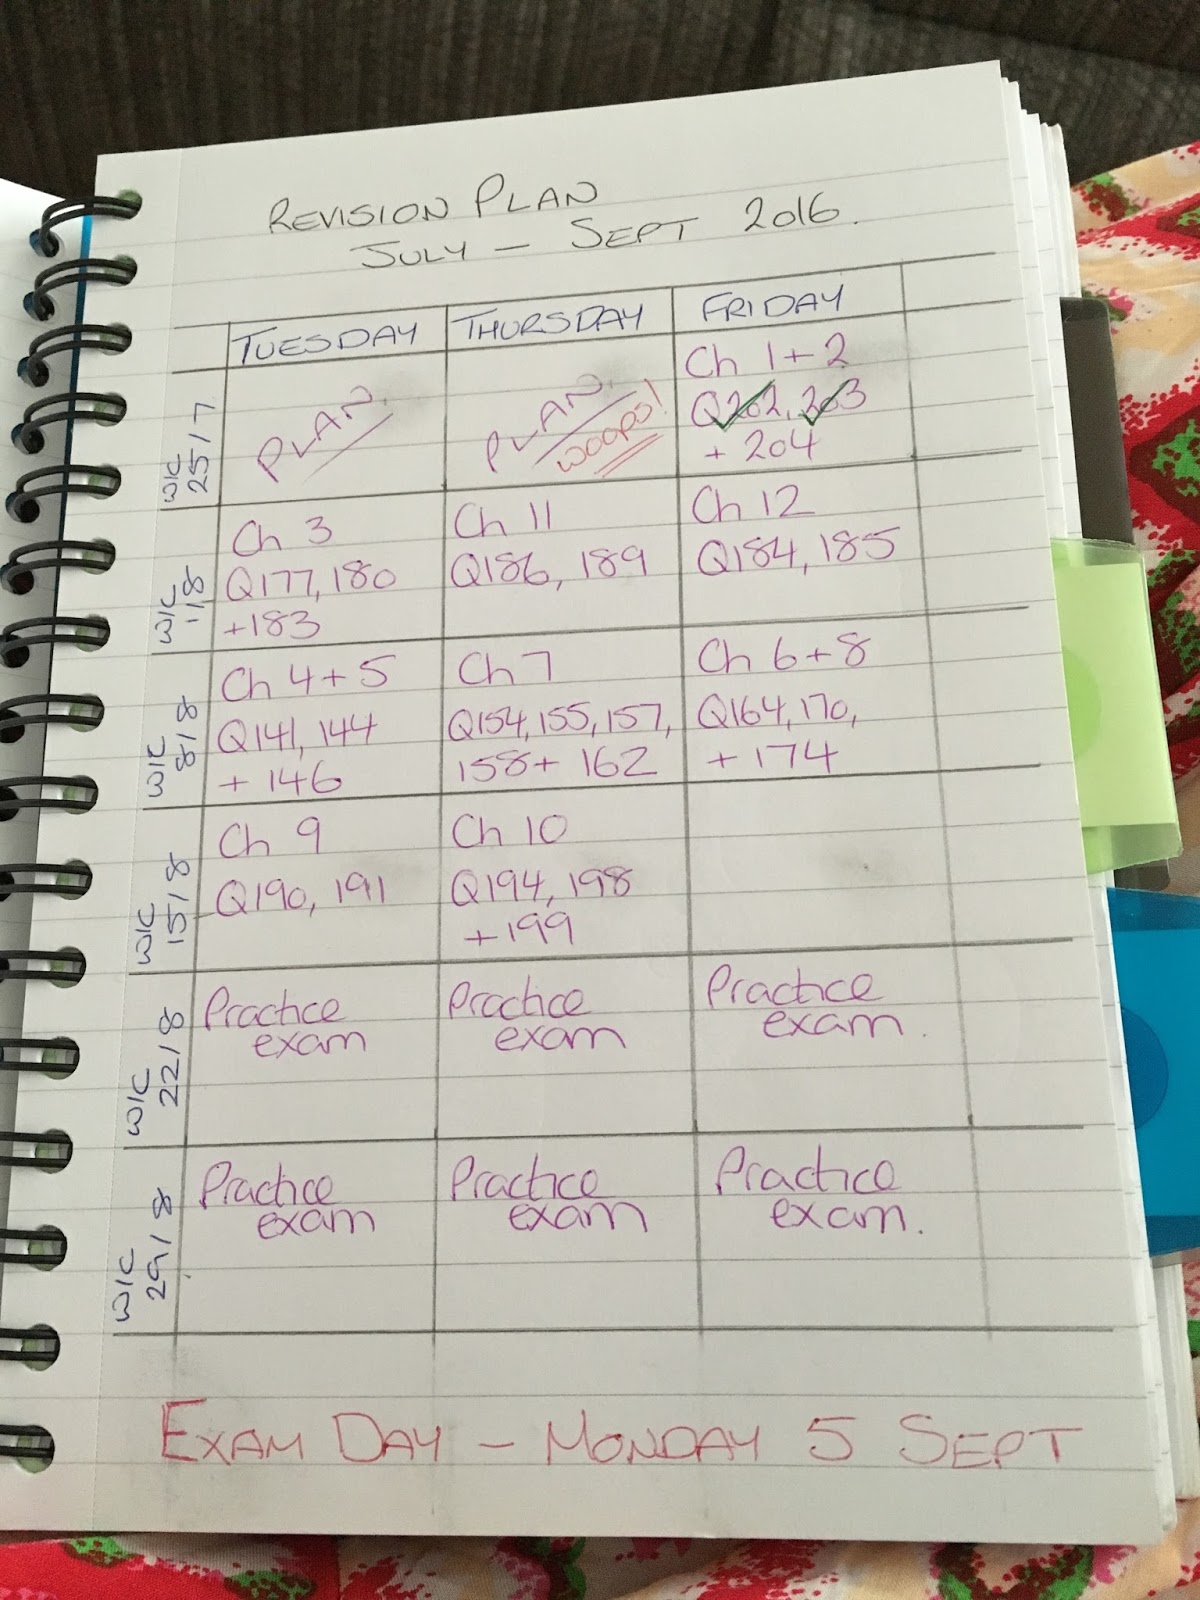
I have split the page into the days that I plan to do some college work and to revise and tried to plan out which chapters I should be working on and the questions to practice once I have worked on specific chapters. Fingers crossed all goes to plan and I pass the exam! I started to write this post a little while ago and have since failed to stick to the plan in its entirety here but I have been able to adapt as I go along - I am still on track to complete everything as I would like to in the next couple of weeks.

My book then goes onto monthly pages. This is a page that I created for July - as you can see I only started half way through the month but i had added it to include my favourite thing that I have done each day or just a positive moment. The best thing about each day basically. I have missed out a few days at the end of the week but I hope to continue this idea into August. I think it's a really positive thing to keep me on track and getting better.
I forgot to set this page up for August as I got carried away with my weekly pages and missed it out but I have still added it into the notebook at the end of the first week. This is why it's so important to plan and to get everything in the right order first time around and why I'm really pleased that I'm not using a good notebook for everything yet.

This is my weekly spread from a few weeks ago which I found someone else had done online so I did use a lot of their ideas to create this. There is a small section for each day to try to keep me organised and on track with what needs doing each evening after work. I have found that this has been really useful actually. I like the idea of keeping a record of what clothes I wear each day. I'm not really sure why or what I'll use it for but I guess I will at least see patterns emerging for what I wear a lot, particularly at work. I know that sometimes I think I should have more smarter days than I actually manage so this could be a good way of keeping track. I also particularly like the colours and details found from the daily activities section and it is really interesting to see in a graph the impact that the amount of sleep that I get impacts on my mood.
I found that I didn't use the weather record on this weekly page and have found it much easier to use the monthly page to record the temperatures to use for my weather crochet project. If you want to see more about this, you can read it on this post here. I will just record this on my monthly pages going forward.

I made the below review of July's pages. I have noticed from reading it back that I have made a few similar comments in here and contradicted myself a couple of times but I managed to get most things sorted as I wanted them as I have continued with August.
Here is the first week that I set up for August - I laid out the days of the week at the top so I can add notes specific to each day in these. I wanted to try and fit everything that I liked from the previous couple of weeks onto the one page but I wasn't sure how this would work so what I ended up with for this week were the days along the top, task activities, shopping list, notes etc on the bottoms of the first page and I have cut a section out of the top so that I can also have a mood log page at the bottom whilst still showing the day's details at the top.
Towards the back of my notebook I have also added a few collections pages.

I have added some notes for places that I would like to visit, places to go and things to do when we go up to Yorkshire each year, places that we would like to visit when we go to Normandy in September. I have also added the below couple of pages. One for TV series that we are watching:
 One with ideas of places that we could go for days out not too far from home:
This one is for stage shows that I would like to see. I particularly like the way that this one has come out. My handwriting isn't normally something that I particularly think about or dislike but this is something that I am starting to think more since starting this book. I have tried writing in a black pen (I normally always use blue for everything) and also making my font be in capitals for this whole page. I think it looks a lot neater than any of the other pages I have done.
I also quite like the little pen drawing at the top of this page. I don't think that I will be massively decorating any of my pages - not like some of the painting and fantastic drawings that some people do but the odd thing like this I think I could manage. This has also given me the idea to use some of the stamps that I have for my card making. I think I would be able to stamp the image and colour them in on a separate sheet of paper/card and add them to some of my pages for decoration. I think I would really enjoy this too as I used to enjoy this part of the card making. I have some lovely colouring pens that I can use.

The last page that I have added recently and one possibly the one that I am most happy with so far is my page for "Do what makes you feel good". This is page of all of the things that I can do when I am feeling a little bit rubbish and want to pick myself up. I have always known that there are a lot of options of things that I enjoy doing and can do during these times but somehow when these kinds of moods come to me, a lot of the nice things that I can do to overcome them often can escape me.
I think that I will find this page really helpful for me.

My notebook at the minute just has a plain black cover which isn't the best for me. I am going to decorate it but again this is something that I think needs perfect planning. The one other thing that I have as suggested by a number of people who create bullet journals is wash tape. I know that people use this to decorate their pages so I think I may try to add some soon.

As well as the stamps coloured in I also like the idea of using wash tape and stickers on my pages. I have added stickers so far with the feet on the Walking Dead - series' watching pages and I like the way that this one has turned out. I will definitely make this prettier as I go through and will also master the layouts that I like best. Since starting to write this, I have received my new pretty notepad to start but I do think that having the planning notepad to use until I start working in the one is a good way of working on layouts and ideas that I wouldn't want to try in a new pad and risk messing it up. I know what I'm like, as soon as I messed something up I would think that the whole thing was ruined and get disheartened with it. At least this way I can rip out a couple of pages if I mess anything up.

Please follow me on histogram if you like my blog posts katelewis88 and I keep you updated with any new blog posts that I make. You can also sign up for the newsletter on this blog to be emailed each time a new post is uploaded.

I will shortly be writing a "part 2" to this blog post as, since starting to write this I have got the new notebook that I wanted and have started to make some entries into there. I'm not working in it fully yet but I will post an update for you soon.

Sunday, 14 August 2016

A girly mum-in-law, daughter-in-law day

Yesterday I had a lovely mother-in-law, daughter-in-law day. The men were both out watching cricket so it left us both together to have a girly day. We weren't too sure what we were going to do for the whole day on our own but were sure that we would find some nice things to get up to.

My hubby had come up with a good idea that we could start to knit a blanket/throw together. if we both knit one square each week for about a year or so then we would have enough squares to sew together to make a lovely blanket/throw.

With this in mind, our first stop yesterday morning, after we'd eaten our breakfast, was Hobbycraft. We had a look around for quite a while - it was nice not to have any men with us huffing and puffing around while we were wandering. I think we looked down pretty much every single isle. It was great to just look at everything - some things we decided were really weird and we really didn't understand, while other things we could really imagine ourselves doing.

The only thing that we came out with though (other than a stamp from the bargain bin for me) was the yarn we would need to make our blanket. We chose 6 different colours - all fairly neutral on the theory that maybe one day this would become a blanket to be used in a babies room if/when me and the hubby decide that a family is something that we would like.
We took it in turns to pick the colours and went for these 6 different ones to give a nice variety (& they were on 3 for 2 so 6 each seemed to make sense!)

Once we had chosen the yarn that we were going to use we needed some thinking time so we went out for a lovely lunch. We shared some tear and share garlic bread to start - which we were mercilessly mocked for later in the day when the blokes got back in as we apparently really stank of garlic! it was amazing at the time! Then we both had a prawn and pea risotto, with sea bass and scallops on for our main. It was lovely but really really filling. I knew after id finished that I probably shouldn't have eaten all of mine but it was too nice to leave any.

We decided against pudding at the pub as we were both stuffed but that didn't mean that we wouldn't be hungry again a bit later. It seemed like the perfect excuse to go back to the house and do some baking after a little dog walk.

I am normally not too good with dogs but am getting better and find it a lot easier to be around them when they are a little less active than they could be. The easiest way to help with this was to wear him out. I therefore aided in this by helping him to get his stick and new prized possession all the way home!
I'm not sure how popular I was when we got back to pavements and he was still carrying it but hey - I thought it was funny! Between us we managed to not scratch or scrape any cars.

It was baking time when we got back. We made my favourite cake ever - Mum L's banana cake! I had donated some rather over-ripe bananas to the cause but the making was a joint effort.
While they baked - this gave us the perfect opportunity to have a look at patterns for ideas for our blanket. I had a look through Ravelry and found a few ideas for squares that we could do. As always I tended to like the plainer patterns and so I wasn't hugely interested in some of the highly intricate designs on offer.

The nicest that I found were a couple of variations on a moss stitch (knit 1, purl 1) so we both tried a sample square. Mum L tried a double moss stitch to start with however we thought that our blanket would be nicest with fairly small squares and therefore it didn't quite look right on this scale.

We have decided on a standard moss stitch for our squares. We needed an odd number of stitches on our needle - we worked out that 19 stitches will make our squares approx 3.5in each which seems a nice size.

This is the beginning of my first square
I like the way that the pattern is starting to form in this square and the size of it too (compared to my thigh!)

This is the way that our first 2 squares are looking
Fairly even - pretty much the same size. Hopefully this will work out well. We have both chosen a different colour this time and I think we will speak about what colour each of us is doing each week but it's not really a problem if we end up with a couple of the same colours together. We will have to decide what pattern we are going to sew them together in too before we can really see how this will turn out. I don't think it should matter if we end up with 2 squares that are the same colour next to each other. I think it will be nice anyway.

The final girly activity of the day was to paint our nails. I did Mum L's first in a nice coral colour. She usually wears red if any so I persuaded her to try something a little bit different. I went for a yellow that I have had for ages but never really worn as I wasn't sure how it would come out when it was on. I thought being such a light colour it would take loads of coats to make it look anything like it does in the bottle. We actually only did 2 coats and it covered pretty well. We both have pretty nails!
I hope you guys all had a lovely chilled out weekend as well and got to enjoy some time to do just what you want to do. Have a good week all and I'll see you again soon.

Sunday, 31 July 2016

A bit of a daft day

It has been a bit of a daft day really but one that I have really really enjoyed. I think I was in need of this kind of lovely fun craziness.

I was woken this morning by the smell of bacon crisping and came downstairs to pretty much my favourite ever breakfast. Pancakes, maple syrup, and bacon. It was awesome! The pancakes even had raisins in. Yum!
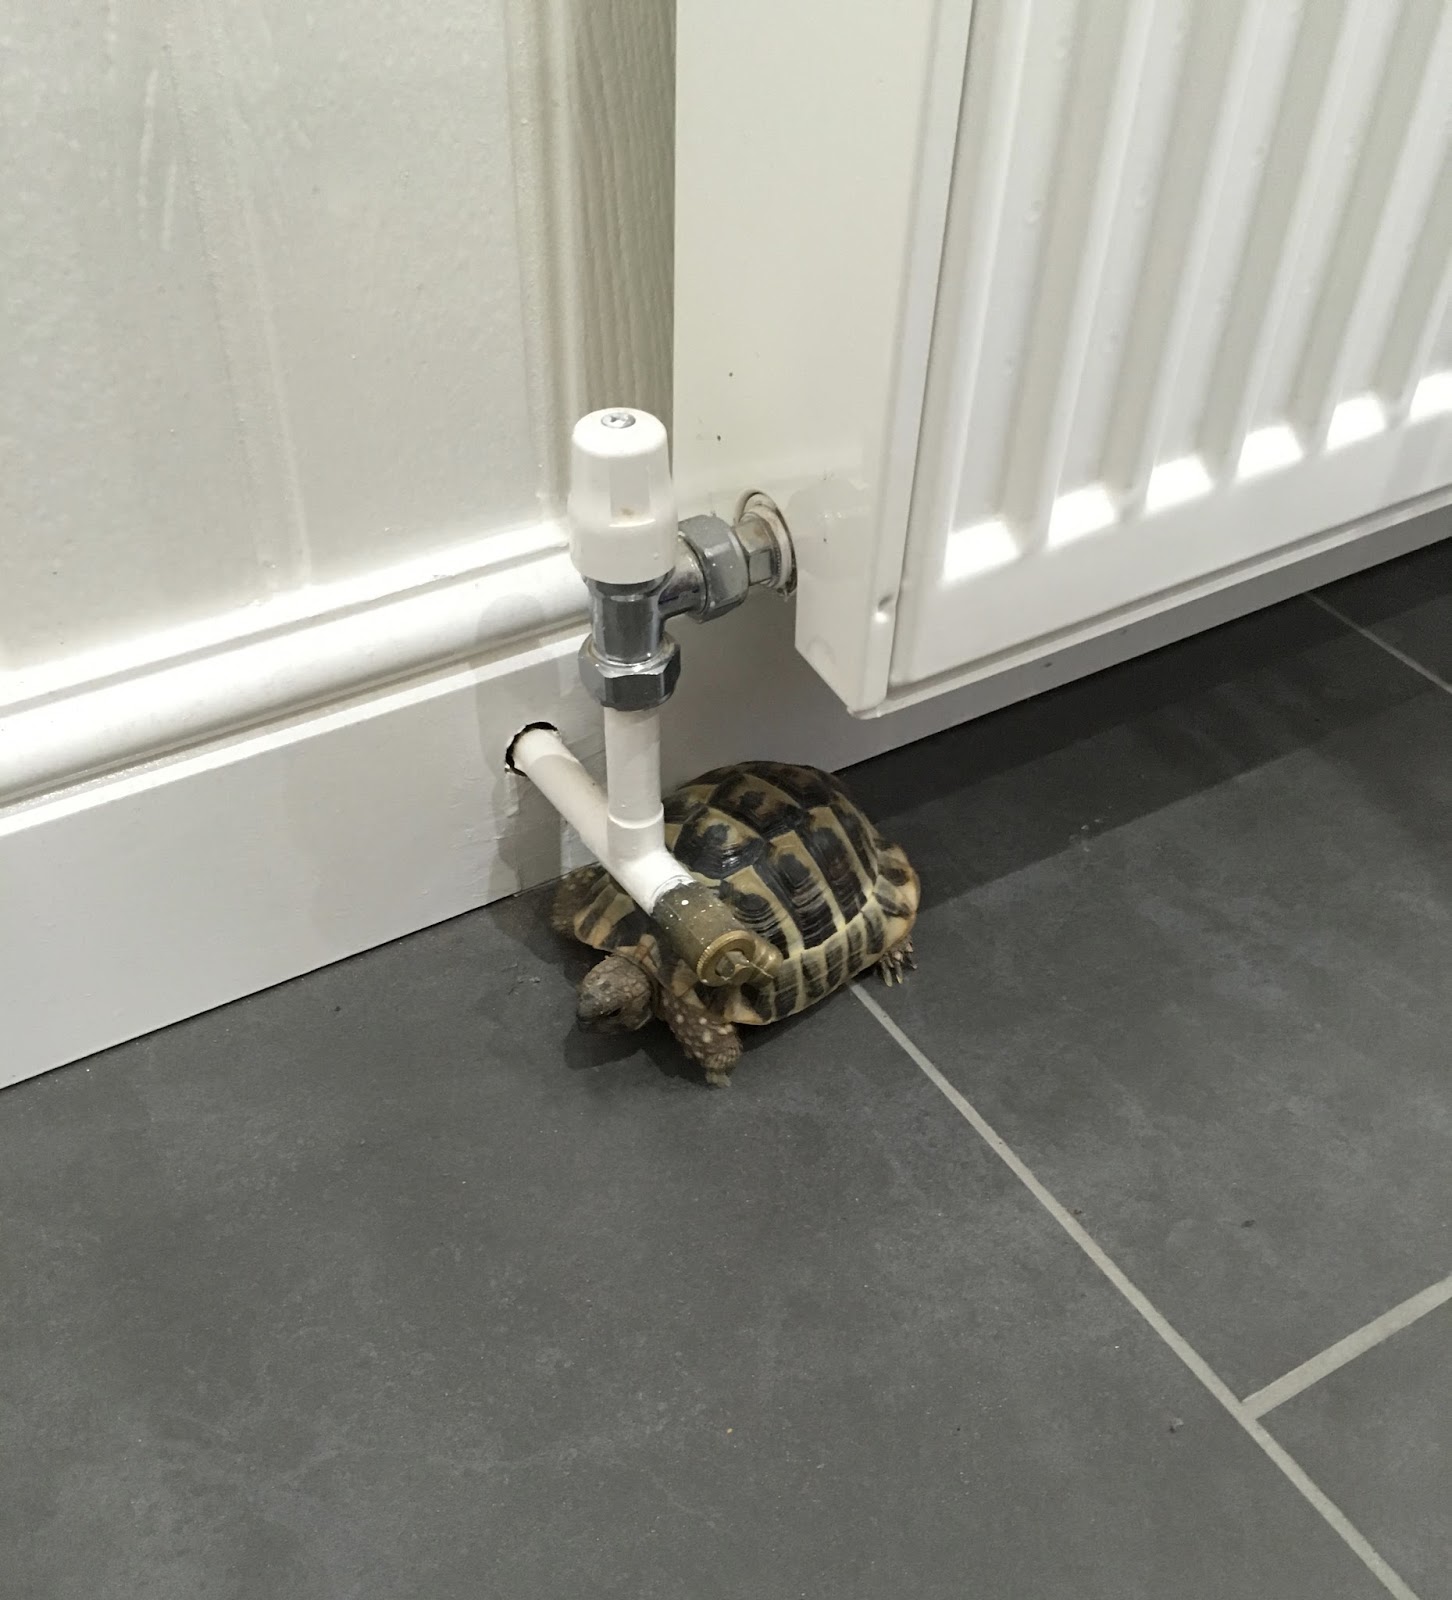
Henlow joined us for breakfast and added fantastic comedy value by trying to a few minutes to walk under this radiator pipe. He has some fantastically smart ideas at times!
We then had to pop out for some shopping. I had seen something online the other day about making some toffee vodka so we treated ourselves to a bottle of vodka and a packet of Werther's Originals. Here is the website that I found the recipe on.

Basically all you have to do is open a full packet of Werther's sweets. Pour them into a sterilised mason jar and add vodka.

This is a full packet of Werther's
Topped up with an entire bottle of vodka
And as soon as we started to shake it, the toffee's started to dissolve into the vodka.
It doesn't look the prettiest after the first shake up but we can only hope that it turns a lovely toffee colour in time. The recipe says to leave the sweets to dissolve for 2 whole days in order for them to completely disappear so we are hoping that the colour will change in this time too.

While we were out I had been saying that I wanted to do something a bit active today - I wasn't sure what but just something a little bit daft playing about in the garden or something. Adam had the idea of playing some ball sports in the garden. I know that he really wanted to try to teach me to play cricket a little bit so we needed a softer ball to play with than a real cricket ball. We got a slightly softer plastic-y version when we went to a toy shop.

While we were there I also found something that I thought could be fun. A skateboard! I had been wanting to do something a bit daft and active so when we saw these in the shop I thought that this would be the perfect thing for me to try. I wasn't sure where I was going to be able to practice but Adam pointed out that we live in a quiet little cut de sac so the road should be fine.

I had a really good time practicing - we even spoke to a bunch of teenagers who came past - they were lovely. They laughed at me a little bit when Adam said that I am nearly 30 and wanted to try to skateboard for the first time but then they had a go and tried to show me what to do. It was nice.

Here is a little video of one of my first attempts. I will need a lot more practice but I don't think it's too bad for a first attempt!

This afternoon I went out again for a bit more practice and was getting a bit better at pushing myself along and keeping the board moving. So much so that I think I got a little bit cocky. I ended up hitting a little pot hole in the road and went absolutely flying. I landed on both hands, my right elbow and right hip. The pads broke my fall a little and protected my hands from some good grazes, the elbow pads helped a little but I still have a little graze on my right elbow. I haven't had a graze since I was little. I have to admit, I'm a little bit proud of my first skateboarding injury!
The vodka has been shaken a fair few times today in between playing some cricket and french cricket (which was actually a lot more fun that proper cricket!) and skateboarding. I know it says in the recipe to wait for 2 days for it to be ready but it also says that it's done when all of the sweets have melted. I don't know if it's because we used 1l of vodka instead of the 70cl that it says in the recipe or what but I'm fairly sure that it has to be ready.

It has changed colour a little bit more and become a nicer honey kind of colour
And decanted back into it's original bottle it still looks nice too. It's such a shame that the sweets had made it so that there was ever so slightly too much for the liquid to fit back in here. We might just have to try a little shot before bed.
Cheers and happy weekend!

The following is the final photo for today and I think that this one pretty much sums up most of our day. A good one has been had by all here. The cider and nachos were a mid afternoon snack and accompaniment to tonights dinner of homemade chilli.
I hope that you have had just as lovely a day on your Sunday. Have a good week and I'll speak to you soon.

Monday, 25 July 2016

My new little "frog lizard" friend

OK so I have just tried my first post on Instagram for the post that I made on Tuesday. I didn't really think that it would hugely do anything as I have never even used Instagram at all but within about 2 minutes of posting I have gone from 1 view on that post (me when I was testing if it worked!) to 5 (another is probably me again) but still I'm sure that that's 3 new people who have looked within a couple of minutes. Hopefully that means that I will have a few more of you reading this and enjoying what I'm doing here.

The last time I posted it wasn't quite in the essence of what I'd like my blogs to be about and that's trying to spread some happiness and show you some of the fun and creative things that I have been trying to do. I just felt I needed a little explanation as to why I've not been around for a while before re-starting to post about the fun and happy stuff.

It was about a year ago now that I joined a WI group close to where I live. The one in the village meets during a day and from the photo's on their website it looks like more of a "traditional" WI group. I therefore found one in a little town not too far away that I have joined. This one is a "modern" take on what a WI should be. There is wine at every meeting and they try to intersperse some of the more traditional talks and things with some more active meetings. I did actually decide to join when I was starting to struggle with how I was feeling and hoped that me going out to meet new people and do something a little bit different each month would help. It has been good for me and I am starting to grow with confidence each month now that I recognise some people who go and am starting to get to know them. I still find some of the activities a little difficult but this month was a classic of showing how I can pleasantly surprise myself.

This month's meeting was on Wednesday of last week and the session was pottery painting. It's something that I never thought that I would have been any good at and really didn't have any confidence in before I started. If I'm honest I even got pretty panicky at the start. Just making the decision of what I was going to paint got my heart racing and then choosing colours was another thing again.

I decided to paint this "frog lizard". I'm calling it that as when I was choosing what to paint I wasn't entirely sure what it was. I knew that whatever I painted was going to end up brightly coloured so I guess it doesn't really matter.

Unfortunately I never thought to take a "before" photo so I'm afraid that the "after" photos later on will have to do.

I decided to add some star shapes to each of its legs and arms as well as a few to it's back too. There were some stickers provided that you were able to stick on and then paint over to leave the shapes blank underneath. I was a little worried that this wouldn't work as well as I would have liked as the stickers didn't seem to stick very well to start with. Apparently there was no knack to this other than to stick and hope and to not put too much paint on so that it was less likely to bleed under the stickers.

It was slightly tricky to be able to tell which colour was which once you had poured them out of their labelled bottles and even more so once you had painted the first layer onto the clay so I am really hoping that I got the yellow and the orange the right way round for the second coat.

Here he is all painted up and with the stickers removed to show the original white underneath. Some of the stars weren't perfect as some of the paint did bleed under the stickers a little but I hope that this will still be ok once it is baked.
I'm really excited to see what he looks like once he's done but this is as finished as I can show you at the minute.
I bottled out of painting his eyes but when I got home my hubby said that he might be able to put a little gloss black paint on them to make the little guy come to life a little more.

There were pre-warnings at the beginning as to how difficult it was to use the bottles with the fine nibs to squeeze out some black ink. These could be used for outlining anything that you want to highlight or to write on our pottery.

I wasn't brave enough to add anything onto the top of my "frog lizard" but I did have a little go right at the end to add my name underneath. We were asked to label them so that it was easy to tell who's is who's once they have all been fired. I did point out that I really can't imagine how many starry multi-coloured "frog lizard's" she is going to have in the kiln at any one time but at least this pushed me to have a go and try the writing paint. I'm quite pleased with how it turned out.
I am trying to keep up with my blogging more often still at the minute and have a few things in the pipeline to tell you about over the next few weeks so I hope that you come back to read more soon.

If you've enjoyed my blog, please comment below and share on your social media. You can also follow me on Instagram using the link at the top right of this page.

Tuesday, 19 July 2016

A long time!

Wow! Yet again, it has been a really long time without posting. it's been over 6 months. They have been a little difficult I have to be honest. I have had some ups and downs within the last few months and have recently been diagnosed with depression which I am currently working hard to try to deal with.

Because of this I have found that I have been really distracted and had very little concentration, inspiration or ability to work on any of the things that i used to enjoy. It has meant that all sewing has been put on hold since before Christmas and there hasn't been a lot of other crafty activity going on either.

The only thing that I have been working on this year really has been my weather crochet.

I have used pretty much the same principle as last year when I made the table runner (which I guess actually you might not have seen yet! - I'll post some photo's of it on the kitchen table shortly) but I changed the ranges for the colours ever so slightly. I narrowed down the temperature ranges for this year on the theory that it didn't really get hugely hot enough to get up to the oranges and reds very much last year. Apparently as of this week I am very wrong!!

This year I went for the following ranges:
Red 20.5 +
Orange 16.5 - 20
Yellow 12.5 - 16
Green 8.5 - 12
Light blue 4.5 - 8
Dark blue 0.5 - 4
Purple 0 or below

I wasn't sure what I was going to make this year as I only have 1 kitchen table and therefore don't need another table runner.

I have decided that I will make a cushion cover. I don't have a particular cushion or size in mind to make but so far have got as far as deciding I will be making 2 runners of crochet (6 months per runner). I have worked out that each one should be roughly the same length, I may just need to add a couple of extra white rows to the shorter of the 2 to make them match up perfectly when I come to attach them together.

As we are now more than half way through the year, I have completed 1 of the 2 runners (other than sewing in the ends! - I haven't been any good at keeping on top of these this time around).
It has got considerably warmer through June however I have also changed the temperature I am using to choose the colours as I did last year.

I have gone for low temperature of each day through January and February, mid temperatures March - May, high temperatures June - August, mid temperatures again through September - November and finally low temperatures for December.

I hope you are all still well and out there somewhere. I am going to try to blog more often again now so watch this space and I will try to get bank on track and keep you updated with everything as I go.

Sunday, 6 December 2015

Starting to get Christmassy

This weekend has been a long one for us here as I had Friday off to try and do some work towards the exam I am sitting next week. I have done my best with the revision but have managed to also find a little time in the afternoons for opening our advent prezzies and starting to fell slightly Christmassy.

On Friday lunchtime I had a little break from my revision and we both opened our advent prezzies for the day. I got socks from my present stack which I do love - everyone has to love Christmas socks! Then, later on in the afternoon (after doing some more work) I had a knock on the door and a lady turned up with these lovely flowers and a box of chocolates for me. Adam said that he thought he was running out of prezzies for all of the days of advent and he knew I would be home so it was a good excuse. They look absolutely gorgeous and go really well in the corner of the room. I love the little bag that they have come in too. I almost don't want to have to move them to make way for the Christmas tree but we will still have the coffee table in the middle of the room so they can stay on there and add a little more decoration to the room.
Yesterday I also had a day off work which I had booked to revise as it's so rare at this time of the year to get a day off on a weekend. Again, I did my best to do some more revision throughout the day but there was still time in the afternoon for present opening and also a little bit of making.

My gift for the day was a soap making kit. Something that I have never tried before but Adam thought would be fun for us both to give a go. This came with everything needed (pretty much) to colour and shape your own bar of soap: instructions, moulds, dyes for colouring and a wooden stick for mixing the colour in.
We started off by cutting a piece of the soap the size that we thought would be about right for the mould that we had chosen and then chopping this into small pieces so that this would melt down evenly and without taking too long.
We heated these in a jug rested into a pan of boiling water
Until it all melted. I didn't manage to get a photo right at the very end as the next part had to be done very quickly.
Once all of the soap had melted together you had to take this off the heat and add the colouring very quickly. Once the dye had been added you couldn't reheat the soap and as soon as the soap was taken off the heat it started to solidify again very very quickly.

We stirred in the colouring as quickly as we could and then transferred the soap to the mould. It had already started to solidify ever so slightly when we poured this into the mould, hence the funny looking blob in the middle of the below photo but we did get it all in there and spread as evenly as we could.
 This then had to go into the fridge for a couple of hours (according to the instructions) to fully solidify. To be honest I can't imagine that it would take this long to set, given how quickly it started to solidify when we were trying to pour it into the mould but we did as we were told.

After a couple of hours we popped the soap out of the mould and it looked like this.
We were very impressed with our efforts! Not bad for a first attempt at making soap. We have said that we both enjoyed doing this and it was a lot less difficult than we thought it could be and it smells really nice too! I think that we will try doing this again shortly and see if we can make a layered soap with different colours to go in the kitchen and match all of the bright colours in there.

While we were making this I also remembered that I had a kit a while ago from one of the Crafty Creatives boxes to make something similar. I couldn't fully remember what this was as I had never tried the kit out. When I went up to look I found that it was actually a kit to make bath bombs and not soap. As I had found the kit we thought we may as well give this a go as well.

With this one you didn't need to heat anything up, just mix the powders together, add some orange flavoured essential oil to make it smell nice and then spray the mixture with a small amount of water, just enough to make the powder stick together to form it into the mould.

We started to use the mixture to fill this mould but when we first made it, it looked like there was nowhere near enough mixture to fill both sides. It was just about the right amount to fill one half of the mould.

As we had never made these before, we weren't really sure what would happen so we thought that the mixture we had made was just for one half. It was fun to make and very easy so we went through the process again. We thought this was very clever and would make the right amount then to fill both halves of the mould and allow us to stick them together to make the traditional bath bomb shape. When we had made the second mixture it looked a little bit like this...
However what we hadn't realised was that the mixture would continue to expand...in hindsight I think that the 1 mixture would have expanded to fill this mould and would probably have become just the right size to fill both halves. Instead, it kept growing and growing to the point when we thought it might be worth separating the mixture and making two bath bombs. There was only one mould that came with the kit so we weren't sure what to use. We found this little washing liquid pot that we thought could be used. We split the mixture in half, replaced enough in the proper mould to create a proper bath bomb shaped one and put a little sphere in here. We weren't sure what would happen with this one or if it would come back out of the pot again once it had expanded in there but decided that the worst case scenario was that the whole of would have to go in the bath with the bath bomb.
This one did expand a fair amount but Adam tried this out in the evening. He took the whole thing into the bath with him and it did fizz well. They both have orange essential oil in and this didn't smell too strong when it was used. We were pleased with the fizz of this one as we were worried that they had expanded too much before they were used and therefore wouldn't fizz when they were in the bath. We will definitely try these again and make sure we use the one mixture to fill the blue mould. Hopefully this would make it look more like a traditional bath bomb next time. It would also be interesting to see if we could put some of the dye into these from the soaps to make them look a little bit nicer next time.

On Saturday evening we had a little bit of time left so I suggested that we start to wrap some of our Xmas prezzies. It's good to have got some wrapped already. No tree yet but these are all ready to go under it when we put it up.
We also treated ourselves to one of our little cupcakes made from the Christmas cake mixture that wouldn't quite fit in the loaf tin. They are coming along very nicely. These ones are being fed with the booze at the same rate at the main cake so they are definitely coming along nicely. We have only shared one so far so there are still 3 left. This. If he have to be a one a weekend treat for the next few weeks.
The very very last thing to tell you is that I have finally finished sewing in all of the ends on my table runner up to the end of November. This is it, the very last month to work on the runner. It has still been fairly warm on the mid temperatures for November so I am hoping that the end will be pretty and show some of the colder colours as I will be back to low temperatures for the very last bit of the runner.
I have so enjoyed doing this and it is just the right amount of work for me to keep going with it. One row a day is just enough to keep it going but not too much that you can get behind so far that it just seems impossible to catch up again.

Have a good December everyone. My Christmas will be officially starting on Wednesday afternoon when I will have finished my exam so I will keep you updated after then of all that we have been up to. I have a few nice crafty days planned later in the month so I will be excited to share these with you and of course we have the tree and other decorations to put up.

Oooh, I almost forgot! Today's gift from my advent tree was a gingerbread house kit too so I will be making gingerbread, using the cutters that come with this kit and turning it into a house too. I'm soo excited. I have wanted to make a gingerbread house for years. I remember building a pre-made one once a long time ago with some girlfriends and it was really good fun. Excited to do this with Adam this year and we should then have plenty of gingerbread to share around too.

Wednesday, 2 December 2015

Advent calendars

This year is definitely the year of the advent calendar in our house. Last year I bought Adam a couple of Lego sets, split them up into 24 parcels and gave him a few blocks each day. This was slightly frustrating for him I think so I wanted to do something similar but slightly less mean this year.

I have wrapped up a number of small prezzies for him again this year but there is more variety this time around.

A while ago I told you about the bag that I had starting to make to contain these parcels. Since then I have managed to attach the pockets to the side panels. I firstly sewed each of the pockets along the bottom to ensure that they would be strong enough to contain a small something.
I tried to line these up with each other to make them as straight as possible before sewing them on. This was really tricky to do as I had to line them up the right way around but then flip them upside down and inside out to get them to be able to attach them.

I folded each of the sides in for each pocket and sewed around the remaining 3 sides in a contrasting colour. I sewed in grey thread on the red panels and red thread on th grey panels. This does slightly highlight the wonky-ness of some of the panels but I can put that down to the bag being homemade!

Once these were all on all of the sides (including the edges), I added a red band to the top edge of each of the panels.
Originally I thought I might be able to use one long piece of canvas for the whole of the bottom and two ends of the bag, however I decided that this would be too difficult to work around the corners. I knew that I could attach these if I had them as separate pieces. The way that I would attach them was in the same way as I would attach the sides of the name cubes that I have made in the past.

Once the red band was attached to each of the panels, I needed to add the handles to the sides. I measured these to be in the middle and matched them up on both sides before sewing these back and forth a few times to endure that they would be secure. They don't need to be too strong as they wont be used too much but might need to be fairly strong as the bag will contain all of the prezzies.
The sides of the bag ended up as below.
I did use these panels then to measure out a lining, this is in the red fabric. All pieces are made and ready to go but I ran out of time before the 1st December to attach this.

All I had time to do from here was to fill the bag and give it to Adam to start opening! I think I am now more excited about his bag of parcels than he is!
The bag was perhaps slightly over-estimated in size for the parcels that I have got. Next year I will have to find things with bigger boxes! I padded it out a little with some tissue paper to make it look slightly fuller! I even hid some of his prezzies in the outside pockets.
I will have to line the bag before next year!

Adam has also wrapped me some advent presents this year. He wasn't sure how to present these and has been nagging me for ages that he wants to have more Xmas decs around the house, especially in other rooms. With this as his excuse, we have bought a small tree for the kitchen. This has gone on the worktop in the corner and looks amazing with all of my prezzies underneath. It almost feels like Christmas already!
So exciting! Happy advent everyone!

I do have just one more thing to tell you about. This year we did make one more calendar between us. This one was done for my mum and dad.
We have wrapped up 25 prezzies for them. Most are bottles of beer but on 1 December we also included two "half pint" glasses. They look like a pint glas but actually cut in half down the middle. Well we wanted to make sure that they will share!
They both seem pretty pleased with it and they are opening the parcels each evening when they get home from work. They are taking it in turns and playing fair which is good!
We had great fun making this one and are really pleased that it is being enjoyed.

For this one we made the tags to hang around the edges. We punched out large circles and then used my festive hole punches to make the gaps to attach the ribbons. These were either small Xmas trees or stockings
I'm really pleased that they seem to be enjoying it. This is definitely my favourite month of the year. A present every day for myself and my loved ones. What can be better!

We both wait until the evening to open our prezzies to each other so we've not opened anything for the 3rd yet but here is what we have so far from stash
I got socks on day 1 and a small jar of sweets yesterday and I gave Adam a little Lego man on day 1 and a new battery for his camera yesterday. I also have my normal advent calendar that I made with my mum some years ago. This one has small chocolates in and fabric decorations to stick on a tree every day. I also got thie one below from one of my bosses at work.
It's lovely. I feel so lucky.

I'm looking forward to getting home and seeing what today brings! So exciting! I hope that you are all enjoying your advent.