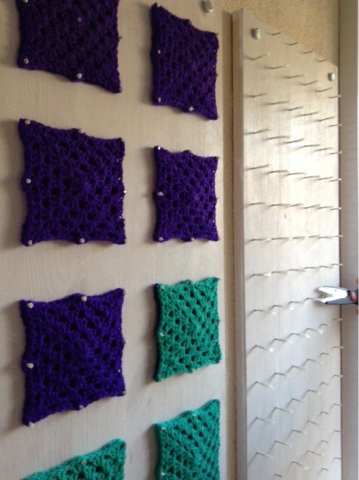
I started off with just 1 layer of squares on some pegs spread across the boards but soon realised that the pins are long enough for 2 layers of squares to sit on them quite comfortably. I therefore went with 2 squares per group of pegs.


Hopefully in this heat (not quite as warm as it has been but still ok) they will dry fairly quickly and I should be able to get through the full amount of squares in not too many days. In the meantime at least they don't look too bad. I wouldn't want them as a permanent feature in our hallway but they could look quite good up in my crafty room.
Instead of bugging you every day or even a couple of times a day for the next week or so with updates I think that this post might have to become a bit of a diary post and wait for a few days befor I actually post it. So above is my first batch of squares pinned out on Monday evening.
Tuesday
The actual blocking of these squares went really really well. I now have a lovely pile of perfectly proportioned squares all ready to be attached together.

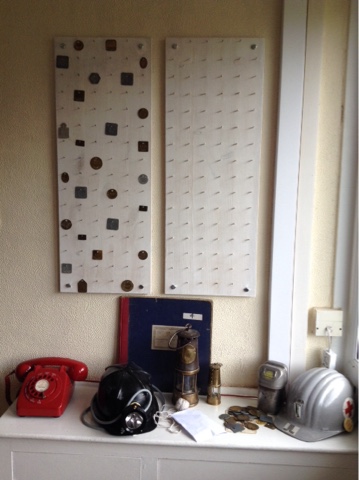
I lef these empty all day today as I had to get to work, however I have been trying to work this out all day today. The only idea that I had was in some way to try covering the pins so that they would not rust any more if I were to put more squares on.
I thought oboist covering the, with paper and taping this around the pins but this seemed really time consuming. Otherwise the only other thing that I could come up with was tape. This might be quite difficult to get off without the paper underneath. My initial idea was electrical tape as i thought that this might be the right width to cover the pins however I thought that again this could be very tricky to get off and I am also not sure if we had any.
I did however find some masking tape. Hopefully this wouldn't be too difficult to get off again once I had finished with it as it is designed to stick to things but then to be removed again afterwards. So begins the pretty laborious task of masking all of the pins that I need to use.

And finally the board is full again.

Wednesday evening
I am getting there now with these. The done pile is definitely growing.

I did try to pin some new ones out again this morning before I left for work but it takes a lot longer than I thought just to put on the new squares so I started and the left hubby to finish for me - he's pretty good to me really! He does have slightly selfish motivation in a way as he would like his pit decorations back to the way that they were before his parents come over on Friday evening but even so that has to be some dedication.
I had to do a few more repairs this evening when I have switched over the squares again. It's the middle pin from each square that ends up loosing its coating first as this is the tightest fit for the squares. Also if I had just decided to not force the squares on through then they would rest on he pin head and then this would most certainly rust through onto the back of the squares.
I have added a little more tape to these - it's going to be tricky to get it all off when I'm done! There's one more full board and another part board to go to get them all done. Hopefully I will get through them all tomorrow and have them off on Friday.
I think I might have to get some kind of board like this put up on the wall in my study/craft room. It could really come in handy for a number of things including blocking crochet and knitting. I am not sure if you need anything like this to pin out patchwork and quilts as well.
Completion of the blocking process
I did eventually manage to get through all of the squares just over a week ago before we went on holiday. The pegs were a bit of a pain in the way that they would rust if they got damp and the tape kept coming off towards the end as that was pretty soggy too - it started to loose it's stick and would just crumple towards the end when you tried to push new squares over it.
Half of the pegs are now returned to normal and have their checks back on but the tape was a real pain to take off, I must have been piggling at it for about 2 hours on Friday evening to get it off just one board.
No comments:
Post a Comment